
This is a short outline to demonstrate how to edit the HTML files used by OBIEE to make customizations for your organization. For this post, I will explain how to add disclaimers within the footer of particular pages used by OBIEE presentation services, along with a simple way to add an Auto-Fill functionality to your log-in page. Each step will be listed that was used complete the task, I will also highlight the proper directories which can be used to find the HTML files to make changes to.
Log-in Page Location
$MW_HOME/Oracle_BI1/bifoundation/web/msgdb/pages/common
OBIEE Home Page Location
$MW_HOME/Oracle_BI1/bifoundation/web/msgdb/pages/bieehome
Administration Pages Location
$MW_HOME/Oracle_BI1/bifoundation/web/msgdb/pages/admin
Adding Auto-fill Credentials to Login Page
1. Open the login.html file with a text editor
2. Search for the label ‘sawlogonuser’
3. For the first <input> element, change ‘value’ to the user name you wish to use for Auto-Fill
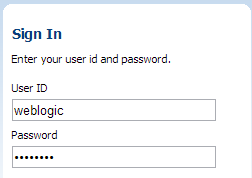
1 2 | <div class="margin-top3"></div> <input class="margin-top5" id="sawlogonuser" style="width: 200px;" type="text" name="NQUser" size="50" value="weblogic" /> |
4. Search for the label ‘sawloginpwd’, and add a value element tag. Insert the value for the password that relates to the user that you’ve provided in the last step
1 2 | <div class="margin-top5"></div> <input class="margin-top5" id="sawlogonpwd" style="width: 200px;" type="password" name="NQPassword" size="50" value="TestPWD554" /> |
5. Save your changes and transfer the file back into the directory you found it. You must restart the presentation services to apply these changes.
6. Your login form should now Auto-fill:
Adding Disclaimer to Login Page
1. Open the login.html file with a text editor
2. Find the <input> element for idlogon and find the section after the <br/> element:
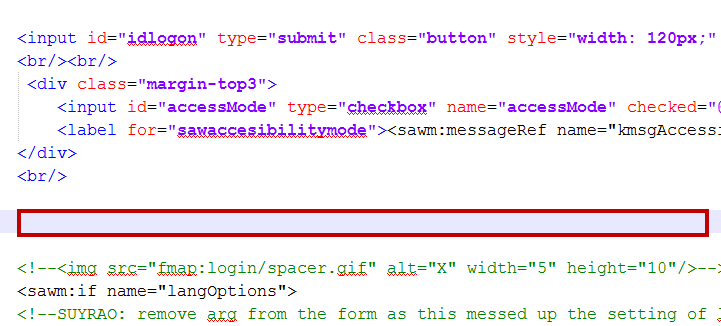
3. Enter the following:
1 | <b>Disclaimer: </b> Place your disclaimer here |
4. Save the file, then transfer it back to the directory you found it in. You will need to restart the presentation services to view the changes that have been made, this does not require a full server restart.
5. A disclaimer should now appear within the login box:

Adding Disclaimer to OBIEE Home Page
1. Open bieehome.html with a text editor
2. Scroll towards the bottom of the page, look for the second </table> element
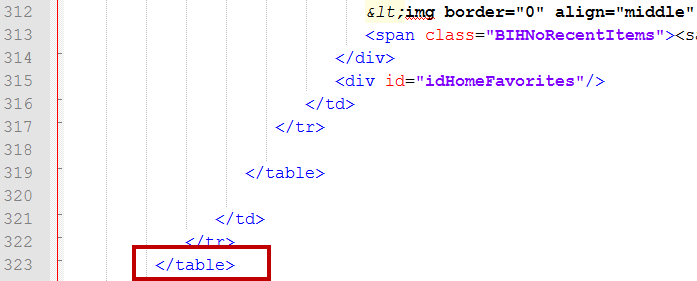
3. Insert the following after the second </table> element:
1 2 3 | <label> <p style="text-align: center;"><b>Disclaimer: </b> Place your disclaimer here</p> </label> |
Save your file and transfer it back into the correct location on the server. You must restart the presentations for these changes to take effect.
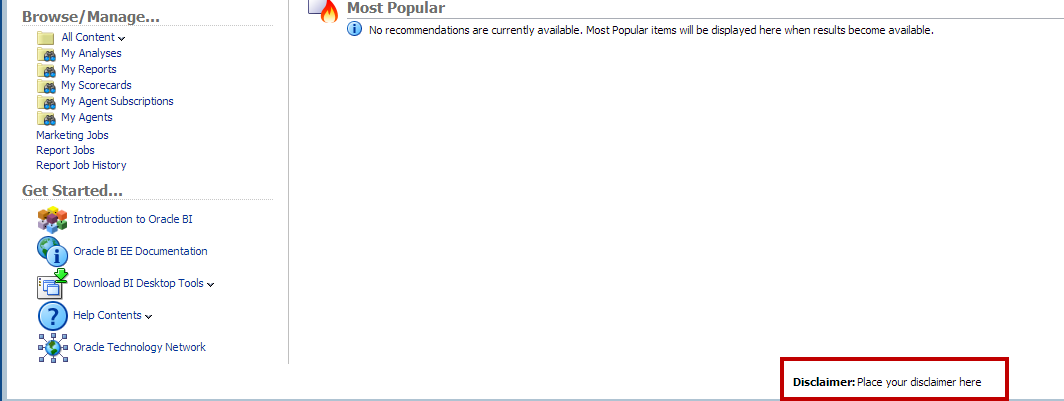
5. You should now see a disclaimer at the bottom of your BI home page:
One Comment on “OBIEE HTML Customizations”
Is there any way to pad the password length to 20 char, if my password is only 10 chars entered and click on login.