
When preparing an analysis, we may not be interested in having all of the data queried for a particular report and you also do not want to require a field for a user to compete in order to run a query. This is one proposed option to fix this issue, we will need to re-purpose a field in our analysis, filter it, and create a required prompt on the dashboard. The first part of this exercise we will set up the analysis and in the second we will set up the prompt for it.
Preparing the Dashboard’s Run Button:
This will become an issue when the dashboard is created. Without this, there will be nothing to stop the dashboard from running when it is opened. Start with a set of columns that you are interested. Then bring any field into the “Selected Columns pane” as our dummy variable:

We will need to change this column completely. We need to select “Edit Formula.”
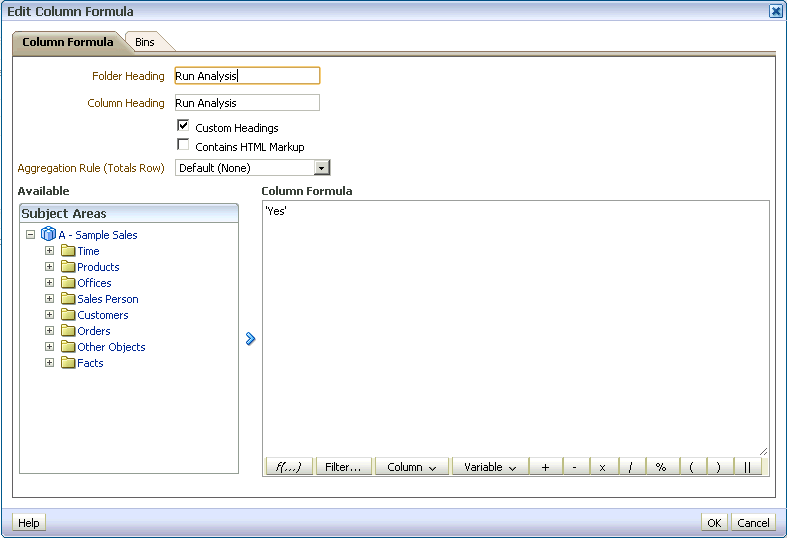
Change the Column heading to “Run Analysis,” and change the Column Formula to ‘Yes.’ The changes should look exactly like the following:
Now, the “Selected Column” pane should have these changes:
![]()
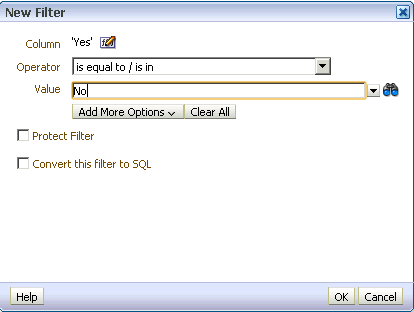
Finally, we need to filter run analysis similarly to the previous selections, but now we will set the filter to equal “No”:
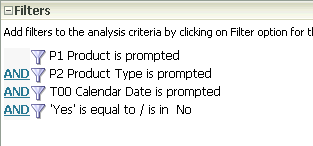
The “Filters” pane should reflect this change shown here:
This will always break the analysis because Yes ≠ No.
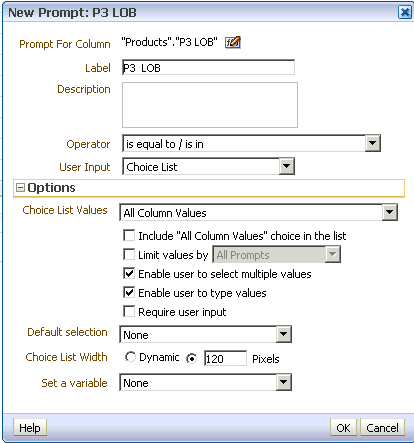
Setting the Prompt for the “Run Analysis” Field in the Analysis:
Remember, if the dashboard was to be put together now, it would never run as a result of the “Run Analysis” field that we created in the analysis. Follow these steps carefully to successfully accomplish this task. The idea behind this is to create something that will make Yes = Yes in the analysis, and currently, it is set to Yes ≠ No. Again, create a column prompt and select any column.
Edit the formula for this prompt:
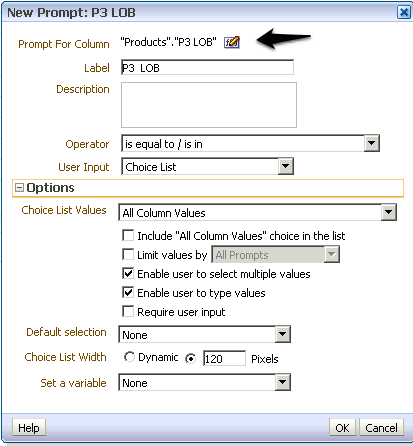
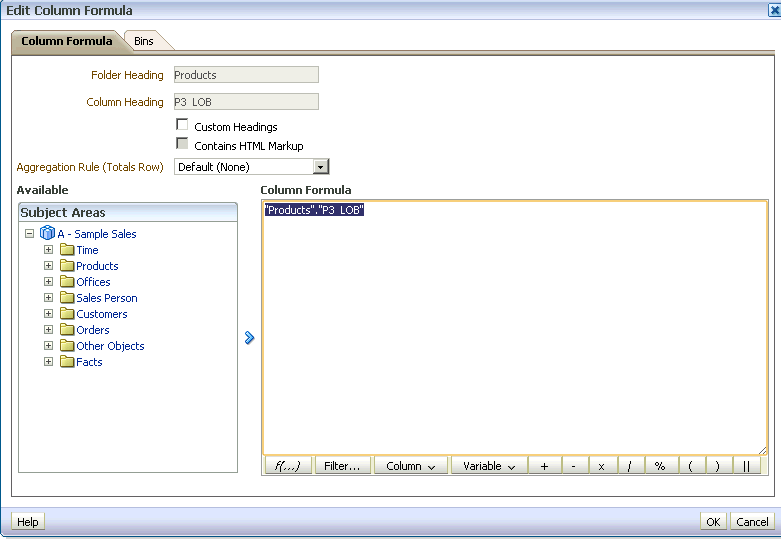
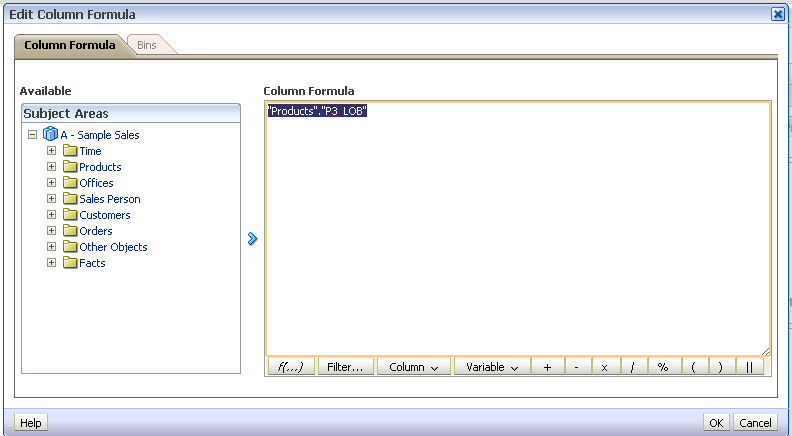
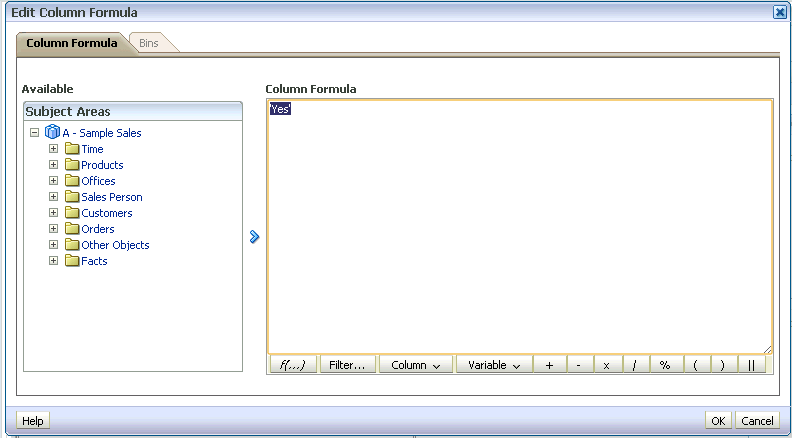
Change “Products”.”P3 LOB” to ‘Yes’, as was done in the analysis.
Change from this:
To this:
Next, change the label to “Run Analysis,” and change the User Input to “Radio Buttons”:
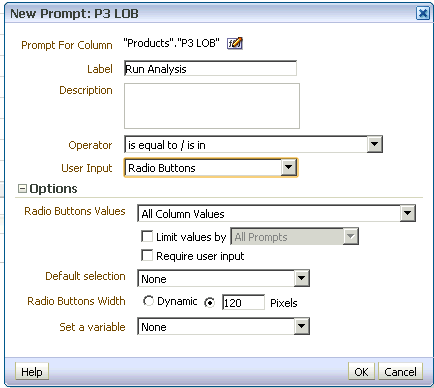
For “Radio Button Values,” select “Specific Column Values” -> the green plus.
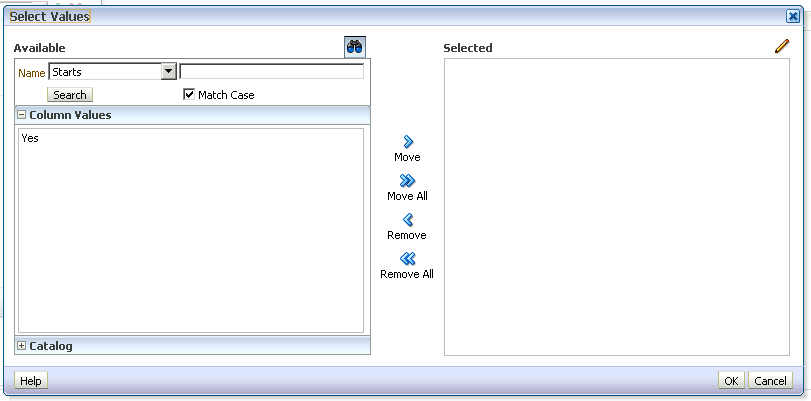
Now, select “Set,” click on the “Move >” button, and select “Ok.” The previous screen should reflect that change.
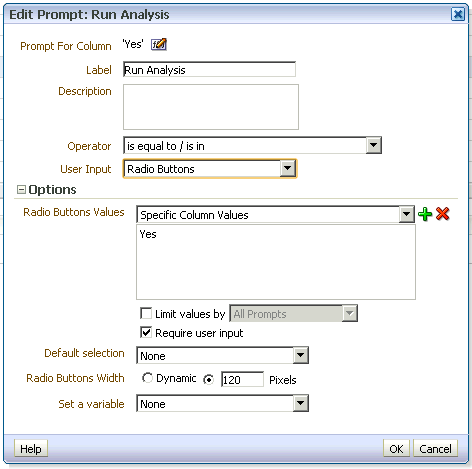
Select “Ok,” and the prompt will reflect the “Run Analysis” radio button:
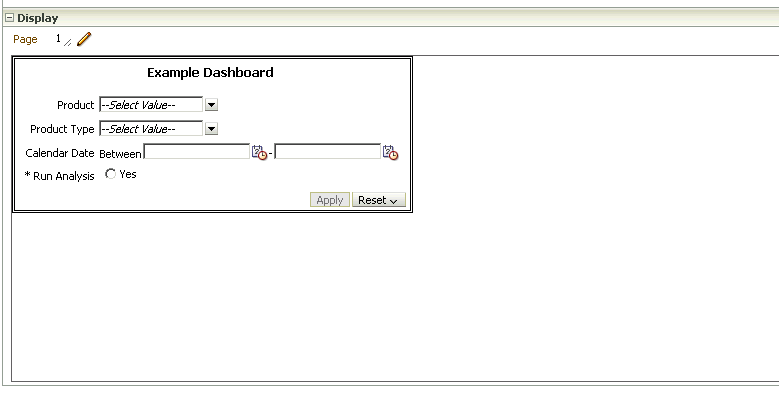
Once all of these steps have been competed and the dashboard has been assembled the user will only need to select “Yes” for the Run Analysis button and choose the other parameters that they would like for their report.
One Comment on “Creating a Run Button on a Dashboard in OBIEE 11g”
Very nice. Saves a lot of database hits.